How to Replace Rear Brake Pads and Rotors: Easy DIY Guide
March 30, 2026
Replacing your rear brake pads and rotors may sound intimidating at first, but after doing it myself, I can confidently say it’s doable for beginners with the right tools and guidance. In this post, I’ll walk you through my personal experience step-by-step, sharing tips, tricks, and important safety notes to help you tackle this essential car maintenance task.
Why Replacing Rear Brake Pads and Rotors Matters
When I noticed squeaking and reduced braking performance on my car while I was in Dubai, I knew it was time to check the brakes. Rear brake pads and rotors are critical for vehicle safety, affecting stopping power, handling, and overall driving confidence, which is why timely Brake pad replacement in Dubai can make a huge difference. Ignoring worn brakes can lead to:- Longer stopping distances.
- Vibrations or grinding noises.
- Damage to rotors could cost more to fix.
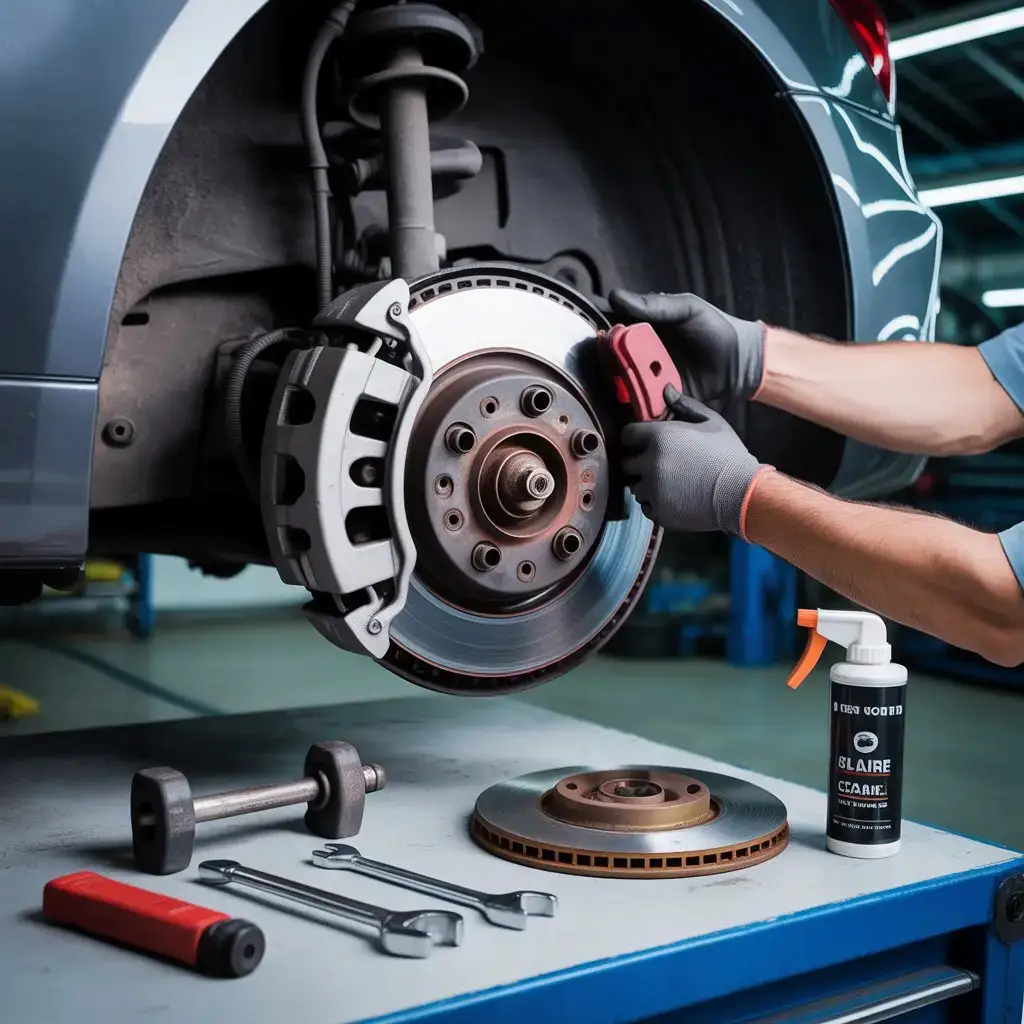
Tools and Materials You’ll Need
Before starting, gather all necessary tools. This makes the process smoother and safer. From my experience, having everything ready saves frustration halfway through the job. You’ll need:- Jack and Jack stand.
- Lug wrench or impact wrench.
- Socket set and ratchet.
- C-clamp or brake caliper tool.
- Screwdrivers.
- Brake cleaner.
- New rear brake pads and rotors.
- Anti-seize lubricant.
Easy Steps for Replacing Rear Brake Pads and Rotors
1. Safety First: Lift and Secure Your Car
I started by parking my Audi on a flat surface in Dubai and engaging the parking brake. Then I used a jack to lift the rear of my Audi and secured it with jack stands. Never rely on the jack alone; safety comes first, especially if you plan on Audi Brake Pads Replacement yourself.2. Remove the Wheels
Detach the rear wheels using a lug wrench. This exposes the brake caliper and rotor. I always loosen the lug nuts slightly before lifting the car; it’s easier that way.3. Remove the Brake Caliper and Old Pads
- Use a socket to remove the caliper bolts.
- Carefully slide the caliper off the rotor. Don’t let it hang by the brake line; use a bungee cord to secure it.
- Pull out the old brake pads. Check them for uneven wear; it can indicate other issues like stuck calipers.
4. Remove the Rotor
Sometimes the rotor slides off easily, but if it’s stuck, tap it gently with a rubber mallet. I always sprayed a little brake cleaner and let it sit. If there was rust buildup, it loosens it up nicely.5. Install New Rotors and Brake Pads
- Place the new rotor on the hub.
- Apply anti-seize lubricant on the back of the pads and slide them into place.
- Compress the caliper piston using a C-clamp so it fits over the new pads.
- Position the caliper and tighten its bolts to the specified torque.
6. Reattach Wheels and Test
- Reinstall the wheels and secure the lug nuts by hand.
- Bring the car down and secure the lug nuts fully using a star pattern.
- Pump the brake pedal a few times to seat the new pads before driving.
Common Mistakes to Avoid
From my experience, beginners often make these errors:- Not securing the car properly on the jack stands
- Forgetting to compress the caliper piston
- Over-tightening or under-tightening bolts
- Skipping the brake test drive